Friday, October 9, 2015

Amazing Balsamic Pot Roast


Falling leaves, dropping temps, and rich foods. Can you feel it? Fall is here, my friends! 

I looove fall! And to celebrate sweaters, boots, blankets, and all things 'fall', I kicked off October with the quintessential Fall Meal: Pot Roast, Squash Soup, and Mashed Potoates.

Now I'm here to share the recipe with you. *You're welcome.*

The secret to making a delicious pot roast is selecting the right meat. I usually defer to my husband's expertise here, but there is one thing I want you to know when making the perfect pot roast. That is; choose the right cut! My favorite is Chuck Roast. It's got the key element of a good pot roast: lots of marbling. Marbling is good for a pot roast because, when cooked for long enough and low enough, all of that fat and connective tissue melts and makes the meat tender and melt-in-your-mouth delicious.

Now that you understand why your meat selection is so important, let's get started!

As always, gather your ingredients first. You'll need Chuck Roast, Onions, Carrots, Balsamic Vinegar, Worcestershire Sauce, Crushed Red Pepper, Honey, Beef Broth, Soy Sauce, and (not shown) Olive Oil, Salt & Pepper.


Before you get started, get your meat ready. You want to really slather it with salt and pepper. I prefer Kosher Salt and fresh cracked Pepper, because they seem to stick better, but really, any you choose is fine. No matter what you use, really get in there with it. It'll seem like too much. That's good. Really coat all sides with it! Then set it aside for later.


Now that the meat is ready, the first step is to heat your olive oil in a large dutch oven or a pot that is oven safe on medium high heat. While the oil is heating, peel your onions and cut them in half. Also, cut your carrots into about one inch pieces. You can peel them, but it's not necessary. (I didn't. Because I'm lazy.) Once the oil is very very hot (but not smoking), add in the onions. Brown them really well on both sides. They may come apart a little. That's ok. 

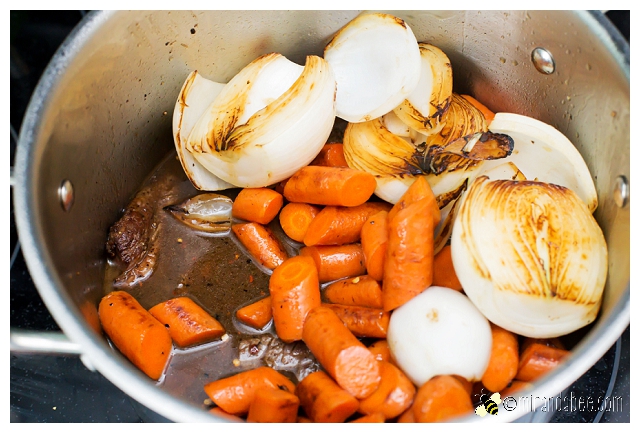
Once that's done, remove them and set them aside for now. Add the carrots to the pot and do the same thing with them. Toss them in the pot until they have a nice, browned color. Remember. The point isn't to cook them. It's just to get a nice color started on the outside.
 
Remove the carrots and set them aside with the onions. Both should look good enough to eat (but don't! You'll need them later).


Now, remember that meat you set aside earlier? Get it ready. It's time for it to shine! Add a little more Olive Oil (or butter, if you want something extra rich) to your pot and let it heat up again. The bottom of the pan should be nice and charred from the carrots and onions. That's good stuff! Once the oil (or butter) is heated, add the chuck roast to the pot.


Sear it on all sides so that it gets a reeeallly nice brown color (about 1-2 minutes each side). Make sure to get all sides. The browner, the better. Once it's seared well, set it aside for now.


In the pan, you should see lots of charred, brown bits in the bottom of the pan. Keep it! That's all of the flavor! So, now we'll do what's called deglazing. That just means adding Beef Broth (about a cup) to your pan and scraping the bottom of the pot. That will loosen all of the char and add the excellent flavor to your roast. In a separate bowl, mix together the Balsamic Vinegar, Worcestershire Sauce, Soy Sauce, Honey, and Red Pepper Flakes. Set it aside.


Once the pot is deglazed, add your chuck roast back to the pan. Try to make it so that the meat is all on one layer at the bottom of the pot (if it's large enough). Then add the sauce mixture over the top and (if needed) add enough extra beef broth so that it covers the meat about halfway. (I didn't have to add any more broth, but you may have to.

Next, you want to add the onion and carrots to the top of the meat. Preheat your oven to 275°

Cover the roast with a lid and place in the oven. You'll need to cook it 4-5 hours to make sure it's nice and tender. (I cooked ours for 4 hours and the fat wasn't quite all the way rendered. So next time I'd make it closer to 5 hours.)

Now just let 'er cook! Don't peek, be patient, and at the end of the timer, you'll be rewarded! Once it's done, shred the meat with two forks. That should be easy, since the meat will just fall apart. Here's what you should end up with:
  
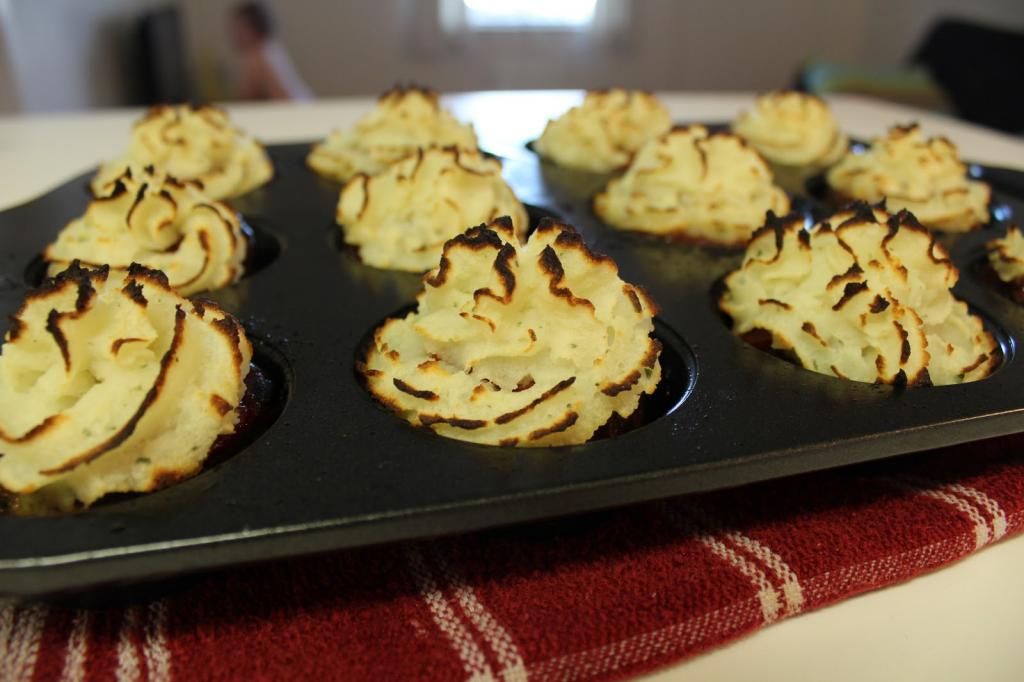
As I said, we served ours with mashed potatoes and squash soup. Enjoy!


Monday, February 23, 2015

DVD (or Bluray) Organization

Today I want to share a simple organization solution to store your DVDs or Bluray discs. It's super easy and has maximum space saving impact.

It turns those piles and piles (and piles) of movies from this...


...into this!

It's a fairly cheap project. All you need is a basket or two, and the sleeves.

We used 2 baskets because I wanted to divide the movies into children/family movies and more adult movies.

I got the baskets in the bathroom storage section of Target, but I couldn't find a link for them online. However, these are similar.

For the sleeves, we use these paper sleeves, but you can also use plastic ones if you prefer. I like the paper ones better because they are about a tenth of the price and work just as well.

All I did was transfer the DVDs from their plastic cases into the sleeves. It's kind of a slow, repetitive process, but extremely easy.


I did was create dividers to organize it alphabetically. I just used my laminator to laminate some scrapbook paper and used a wet erase marker to write the letters. I plan to purchase stickers to give it a cleaner look. I just haven't done it yet.

Another thing I did was to cut the paper cover to fit into the DVD sleeve.

That way if someone forgets to put the DVD back when they are done, they are all still accounted for.

That's it. done-zo. How easy was that? And it frees up SO much space! At first I was hesitant to get rid of the plastic DVD cases I had a lot of the normal hesitations:
"What if I want to sell the movies?" One, how likely is that, really? If I do decide to get rid of them, I will most likely donate them. Two, if I did want to sell them, someone would still buy them without the plastic case.
"Well what if I need the plastic cases?" For what? to take up valuable space in my home and make it look cluttered?
"What if I regret throwing them away?" See previous answers! You won't regret it!

Tuesday, February 10, 2015

Homemade Thai Sweet Chili Sauce

Let me just start off by saying I love Thai Sweet Chili Sauce (affiliate link). I put it in stir fry dishes, on veggies, on chicken, on fish, as a dipping sauce... you name it, I'll eat it that way. So when I went to make a recipe I found called Broiled Salmon with Thai Sweet Chili Glaze and realized I had forgotten to buy the sauce I about went into a panic. I had been looking forward to this meal all day. Bummer central.

Luckily, I kept a clear head and went to the all knowing Google. And sure enough; lots of people had tried to make their own. I looked through a few recipes, tweaked and combined some, and came up with my own version.


Add rice vinegar, water, and sugar to a pan on medium high and stir until dissolved.


Add crushed red pepper and minced garlic.


Now, just reduce the heat and let it simmer for 5 or 10 minutes.

In order for it to be a thick sauce like it needs to be, we have to create a slurry to add to it. Don't worry. It's as easy as mixing Cornstarch with Water.
Put the cornstarch in a bowl and add cold water to it while stirring with a fork. You now have a slurry.


Stir the slurry into your pot and mix with a whisk.

The sauce will immediately thicken up. Once you do this turn your heat down again (it should be on the "off" end of low).

After that add the fish sauce. This just adds a bit of saltiness. If you don't have fish sauce, you could use soy sauce or a pinch of salt (or even forgo it altogether).


Now all you have to do is wait for it to cool and bottle it up. You can reuse an empty bottle or use a glass container you already have.


print recipe


Copycat Thai Sweet Chili Sauce
By
February 7, 2015
A mild sweet chili sauce perfect for dipping with spring rolls, dim sum, bbq meats and more!  
Cook Time: 15 Minutes Yield: 10 oz Bottle

Ingredients
  • ¾ cup Sugar
  • ½ cup Rice Vinegar
  • ¼ cup Water
  • 1 Tbsp Crushed Red Pepper
  • 1 Tbsp Minced Garlic
  • 1 Tbsp Cornstarch
  • 1 Tbsp Cold Water
  • ½ Tbsp Fish Sauce
Recipe Instructions

  1. Add rice vinegar, water, and sugar to a pan on medium high and stir until dissolved.
  2. Add crushed red pepper and minced garlic to pan.
  3. Bring to a boil then reduce the heat and let it simmer for 5 or 10 minutes.
  4. Create a slurry by putting the cornstarch in a bowl and adding cold water to it while stirring with a fork. Whisk the slurry into the pan.
  5. The sauce will immediately thicken up. Once you do this turn your heat down again (it should be on the "off" end of low) and add the Fish Sauce.
  6. Let it cool and bottle it up. Keep refrigerated.

If you have any questions, feel free to comment and I will help in any way I can! And be sure to leave a note telling me how you liked it! :)


Sunday, February 8, 2015

Books in Review: The Probable Future


I read a lot. I would guess that I average about 40 books a year. It's not uncommon that I spend a few hours on a "me day" and finish a book in one sitting. It just recharges me like nothing else can. I love getting lost in worlds that aren't our own and experiencing things that I otherwise never would.

I love sharing that feeling. That's what this Books in Review blog series is about. Sharing that feeling.

(Before we begin, I want to remind you that the links below are affiliate links. There's nothing you need to do. That just means that if you decide to buy the book from that link, I get a very small commission. It in no way changes my opinion of the books and it doesn't cost you any extra.)


Alice Hoffman

Quick Synopsis: The women of the Sparrow family have lived in New England for generations. Each is born in the month of March, and at the age of thirteen, each develops an unusual gift. Elinor can literally smell a lie. Her daughter, Jenny, can see people’s dreams as they’re dreaming them. Granddaughter Stella, newly a teen, has just developed the ability to see how other people will die. Ironically, it is their gifts that have kept Elinor and Jenny apart for the last twenty-five years. But as Stella struggles to cope with her disturbing clairvoyance, the unthinkable happens: One of her premonitions lands her father in jail, wrongly accused of homicide. The ordeal leads Stella to the grandmother she’s never met and to Cake House, the Sparrow ancestral home full of talismans and fraught with history. Now three generations of estranged Sparrow women must come together to turn Stella’s potential to ruin into a potential to redeem.

My Thoughts: I really wasn't all too enthused when my book 
club selected this book. I just don't usually enjoy books about magic and witchcraft. The book definitely isn't my "type". But, I have to say, I was pleasantly surprised. It actually reminded me a lot of Wuthering Heights which is one of my all-time favorites. It's more of a story about family and regretting the past and watching your children, hoping they won't repeat your mistakes. I highly, highly recommend it!

My Rating: 4/5 Stars

See additional title by this author HERE.

Saturday, February 7, 2015

Meatloaf Cupcakes

Listen. I never realized how many things you could make in the shape of cupcakes. It's amazing. Just a quick search on Pinterest will produce tons of results! And I'll tell ya... I love it!! You wouldn't think so, but just making food in the shape of a cupcake seems to make it taste better. No? Is that just me? Anyway, I digress.

The latest recipe I've come across was Meatloaf Cupcakes, thanks to Susan over at SGCC. Though, I used my own recipe for the actual meatloaf. Meatloaf just so happens to be one of my favorite foods, so when I saw this I couldn't wait to try it. It turned out awesomely and I've made it several times since.

First thing's first. Preheat your oven to 350 degrees.

Next, gather up your ingredients. Ground beef (or you could use ground turkey), bread crumbs, onion, garlic, carrots (I used shredded for ease), pepper, salt, chili powder, cayenne pepper, ground thyme, an egg, and mashed potatoes (not shown).
First, you need to mix the bread crumbs, salt, pepper, cayenne pepper, chili powder, and thyme in a large mixing bowl.
Chop the onion, mince the garlic, and dice the carrot (unless you got the shredded like me) and add them to the mixing bowl.
Add the ground beef and mix it well, but make sure not to squeeze the ground beef. That will make it dry.
Once it's well mixed, add it evenly to a greased cupcake pan.
*(A trick I've learned to make it easier is to use the foil cupcake liners instead of greasing the pan!)*
Now put the cupcakes into your oven for 30 minutes.

While they are cooking, it's time to make the glaze. For the glaze you will need ketchup, cround cumin, honey, Worcestershire sauce, and your favorite hot sauce.

When the cupcakes have 20 minutes left on the timer, add the glaze.

The final step is to add the mashed potato "icing". Make mashed potatoes however you normally would. It can be from scratch, from a box, or whatever. But make sure to make them slightly creamier than normal so they will pipe better.

Now pipe them onto the cupcakes. If you don't have a piping bag, simply use a Ziplock bag. Put them back into the oven and broil for 2-3 minutes.


And there you have it! Meatloaf Cupcakes! Happy eating!


print recipe


Meatloaf Cupcakes with Mashed Potato Frosting
By ,  
February 7, 2015
A fun twist on traditional, savory meatloaf!
Prep Time: 30 Minutes Cook Time: 33 Minutes  
Yield: 12 Cupcakes

Ingredients
  • 2 lbs Ground Beef
  • 1½ cups Bread Crumbs
  • ½ Medium Onion, Chopped
  • 3 Cloves Garlic, Minced
  • ¼ cup Carrots, Diced or Shredded
  • ½ tsp Black Pepper
  • 1½ tsp Salt
  • ½ tsp Cayenne Pepper
  • 1 tsp Chili Powder
  • 1 tsp Thyme
  • 1 Egg
  • Mashed Potatoes (for "Icing")
  • ½ cup Ketchup
  • 1 tsp Ground Cumin
  • 1 Tbsp Honey
  • Dash Hot Sauce (any kind)
Recipe Instructions

  1. Preheat the oven to 350° then Mix the bread crumbs, salt, pepper, cayenne pepper, chili powder, and thyme in a large mixing bowl.
  2. Add the chopped onion, minced garlic, and diced carrot to the mixing bowl.
  3. Mix in the ground beef to the bowl, making sure not to squeeze the beef (that will dry it out).
  4. Once it's well mixed, add it evenly to a greased cupcake pan (or use foil cupcake liners instead of greasing the pan to make it easier.)
  5. Place in the oven and set the timer for 30 minutes.
  6. While they are cooking, make the glaze. Simply mix the ingredients in a bowl. When the cupcakes have 20 minutes left, add the glaze.
  7. Make mashed potatoes however you normally would, but slightly creamier than normal so they will pipe better. Then pipe them onto the cupcakes and broil for 2-3 minutes.

Thursday, September 18, 2014

Books in Review: Devil in the White City


I read a lot. I would guess that I average about 40 books a year. It's not uncommon that I spend a few hours on a "me day" and finish a book in one sitting. It just recharges me like nothing else can. I love getting lost in worlds that aren't our own and experiencing things that I otherwise never would.

I love sharing that feeling. That's what this Books in Review blog series is about. Sharing that feeling.

(Before we begin, I want to remind you that the links below are affiliate links. There's nothing you need to do. That just means that if you decide to buy the book from that link, I get a very small commission. It in no way changes my opinion of the books and it doesn't cost you any extra.)


Erik Larson

Quick Synopsis: Erik Larson intertwines the true tale of the 1893 World's Fair and the cunning serial killer who used the fair to lure his victims to their death. Combining meticulous research with nail-biting storytelling, Erik Larson has crafted a narrative with all the wonder of newly discovered history and the thrills of the best fiction.

My Thoughts: This book is classified as historical fiction, but that's only because there were parts that weren't explicitly stated in his extensive research, so he had to infer what happened. It is so historically accurate that, for all intents and purposes, it's more historical and less fiction. I'll admit that the beginning was a bit slow for me, but once I got past the parts that mostly talked about how they decided on a location for the fair and the like, it was incredibly worth it. Larson made the real life events come to life in this novel.

My Rating: 4/5 Stars


See additional titles by this author HERE.