Falling leaves, dropping temps, and rich foods. Can you feel it? Fall is here, my friends!
I looove fall! And to celebrate sweaters, boots, blankets, and all things 'fall', I kicked off October with the quintessential Fall Meal: Pot Roast, Squash Soup, and Mashed Potoates.
Now I'm here to share the recipe with you. *You're welcome.*
The secret to making a delicious pot roast is selecting the right meat. I usually defer to my husband's expertise here, but there is one thing I want you to know when making the perfect pot roast. That is; choose the right cut! My favorite is Chuck Roast. It's got the key element of a good pot roast: lots of marbling. Marbling is good for a pot roast because, when cooked for long enough and low enough, all of that fat and connective tissue melts and makes the meat tender and melt-in-your-mouth delicious.
Now that you understand why your meat selection is so important, let's get started!
As always, gather your ingredients first. You'll need Chuck Roast, Onions, Carrots, Balsamic Vinegar, Worcestershire Sauce, Crushed Red Pepper, Honey, Beef Broth, Soy Sauce, and (not shown) Olive Oil, Salt & Pepper.
Before you get started, get your
meat ready. You want to really slather it with salt and pepper. I prefer
Kosher Salt and fresh cracked Pepper, because they seem to stick
better, but really, any you choose is fine. No matter what you use,
really get in there with it. It'll seem like too much. That's good.
Really coat all sides with it! Then set it aside for later.
Now that the meat is ready, the first step is to heat your olive oil in a
large dutch oven or a pot that is oven safe on medium high heat. While
the oil is heating, peel your onions and cut them in half. Also, cut
your carrots into about one inch pieces. You can peel them, but it's not necessary. (I didn't. Because I'm lazy.)
Once the oil is very very hot (but not smoking), add in the onions.
Brown them really well on both sides. They may come apart a little.
That's ok.
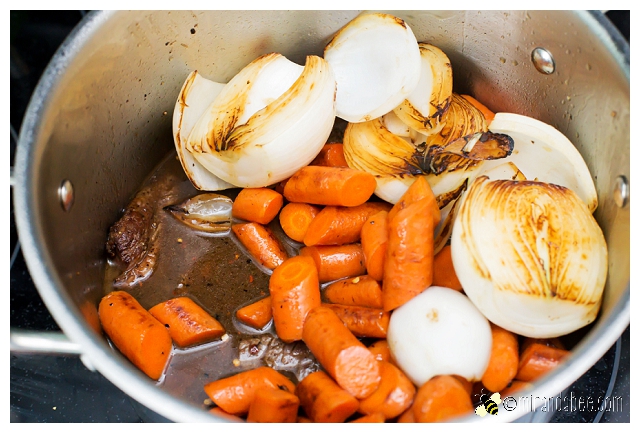
Once that's done, remove them and set them aside for now. Add the
carrots to the pot and do the same thing with them. Toss them in the pot
until they have a nice, browned color. Remember. The point isn't to
cook them. It's just to get a nice color started on the outside.
Remove the carrots and set them aside with the onions. Both should look
good enough to eat (but don't! You'll need them later).
Now, remember that meat you set aside earlier? Get it ready. It's time
for it to shine! Add a little more Olive Oil (or butter, if you want
something extra rich) to your pot and let it heat up again. The bottom of the pan
should be nice and charred from the carrots and onions. That's good
stuff!
Once the oil (or butter) is heated, add the chuck roast to the pot.
Sear it on all sides so that it gets a reeeallly nice brown color (about
1-2 minutes each side). Make sure to get all sides. The browner, the
better. Once it's seared well, set it aside for now.
In the pan, you should see lots of charred, brown bits in the bottom of
the pan. Keep it! That's all of the flavor! So, now we'll do what's
called deglazing. That just means adding Beef Broth (about a cup) to
your pan and scraping the bottom of the pot. That will loosen all of the
char and add the excellent flavor to your roast.
In a separate bowl, mix together the Balsamic Vinegar, Worcestershire
Sauce, Soy Sauce, Honey, and Red Pepper Flakes. Set it aside.
Once the pot is deglazed, add your chuck roast back to the pan. Try to
make it so that the meat is all on one layer at the bottom of the pot
(if it's large enough). Then add the sauce mixture over the top and (if
needed) add enough extra beef broth so that it covers the meat about
halfway. (I didn't have to add any more broth, but you may have to.
Next, you want to add the onion and carrots to the top of the meat.
Preheat your oven to 275°
Cover the roast with a lid and place in the oven. You'll need to cook it
4-5 hours to make sure it's nice and tender. (I cooked ours for 4 hours
and the fat wasn't quite all the way rendered. So next time I'd make it
closer to 5 hours.)
Now just let 'er cook! Don't peek, be patient, and at the end of the
timer, you'll be rewarded! Once it's done, shred the meat with two
forks. That should be easy, since the meat will just fall apart. Here's
what you should end up with:
As I said, we served ours with mashed potatoes and squash soup.
Enjoy!
Showing posts with label Main Dishes. Show all posts
Showing posts with label Main Dishes. Show all posts
Friday, October 9, 2015
Amazing Balsamic Pot Roast
Saturday, February 7, 2015
Meatloaf Cupcakes
Listen. I never realized how many things you could make in the shape of cupcakes. It's amazing. Just a quick search on Pinterest will produce tons of results! And I'll tell ya... I love it!! You wouldn't think so, but just making food in the shape of a cupcake seems to make it taste better. No? Is that just me? Anyway, I digress.
The latest recipe I've come across was Meatloaf Cupcakes, thanks to Susan over at SGCC. Though, I used my own recipe for the actual meatloaf. Meatloaf just so happens to be one of my favorite foods, so when I saw this I couldn't wait to try it. It turned out awesomely and I've made it several times since.
First thing's first. Preheat your oven to 350 degrees.
Next, gather up your ingredients. Ground beef (or you could use ground turkey), bread crumbs, onion, garlic, carrots (I used shredded for ease), pepper, salt, chili powder, cayenne pepper, ground thyme, an egg, and mashed potatoes (not shown).
 First, you need to mix the bread crumbs, salt, pepper, cayenne pepper, chili powder, and thyme in a large mixing bowl.
 Chop the onion, mince the garlic, and dice the carrot (unless you got the shredded like me) and add them to the mixing bowl.
Add the ground beef and mix it well, but make sure not to squeeze the ground beef. That will make it dry.
 Once it's well mixed, add it evenly to a greased cupcake pan.
*(A trick I've learned to make it easier is to use the foil cupcake liners instead of greasing the pan!)*
 Now put the cupcakes into your oven for 30 minutes.
While they are cooking, it's time to make the glaze. For the glaze you will need ketchup, cround cumin, honey, Worcestershire sauce, and your favorite hot sauce.
When the cupcakes have 20 minutes left on the timer, add the glaze.
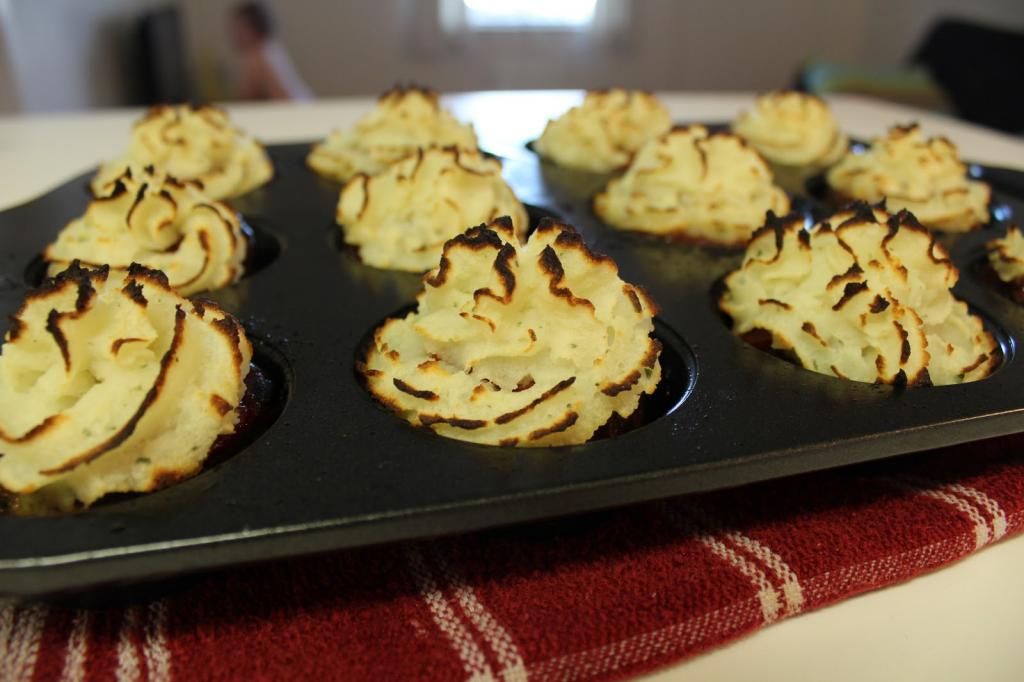
The final step is to add the mashed potato "icing". Make mashed potatoes however you normally would. It can be from scratch, from a box, or whatever. But make sure to make them slightly creamier than normal so they will pipe better.
Now pipe them onto the cupcakes. If you don't have a piping bag, simply use a Ziplock bag. Put them back into the oven and broil for 2-3 minutes.
Next, gather up your ingredients. Ground beef (or you could use ground turkey), bread crumbs, onion, garlic, carrots (I used shredded for ease), pepper, salt, chili powder, cayenne pepper, ground thyme, an egg, and mashed potatoes (not shown).
Add the ground beef and mix it well, but make sure not to squeeze the ground beef. That will make it dry.
*(A trick I've learned to make it easier is to use the foil cupcake liners instead of greasing the pan!)*
While they are cooking, it's time to make the glaze. For the glaze you will need ketchup, cround cumin, honey, Worcestershire sauce, and your favorite hot sauce.
When the cupcakes have 20 minutes left on the timer, add the glaze.
The final step is to add the mashed potato "icing". Make mashed potatoes however you normally would. It can be from scratch, from a box, or whatever. But make sure to make them slightly creamier than normal so they will pipe better.
Now pipe them onto the cupcakes. If you don't have a piping bag, simply use a Ziplock bag. Put them back into the oven and broil for 2-3 minutes.
And there you have it! Meatloaf Cupcakes! Happy eating!
print recipe

Prep Time: 30 Minutes Cook Time: 33 Minutes
Yield: 12 Cupcakes
Ingredients

Meatloaf Cupcakes with Mashed Potato Frosting
By Miranda at mirandabee.com,
February 7, 2015
A fun twist on traditional, savory meatloaf!By Miranda at mirandabee.com,
February 7, 2015
Prep Time: 30 Minutes Cook Time: 33 Minutes
Yield: 12 Cupcakes
Ingredients
- 2 lbs Ground Beef
- 1½ cups Bread Crumbs
- ½ Medium Onion, Chopped
- 3 Cloves Garlic, Minced
- ¼ cup Carrots, Diced or Shredded
- ½ tsp Black Pepper
- 1½ tsp Salt
- ½ tsp Cayenne Pepper
- 1 tsp Chili Powder
- 1 tsp Thyme
- 1 Egg
- Mashed Potatoes (for "Icing")
- ½ cup Ketchup
- 1 tsp Ground Cumin
- 1 Tbsp Honey
- Dash Hot Sauce (any kind)
Recipe Instructions
- Preheat the oven to 350° then Mix the bread crumbs, salt, pepper, cayenne pepper, chili powder, and thyme in a large mixing bowl.
- Add the chopped onion, minced garlic, and diced carrot to the mixing bowl.
- Mix in the ground beef to the bowl, making sure not to squeeze the beef (that will dry it out).
- Once it's well mixed, add it evenly to a greased cupcake pan (or use foil cupcake liners instead of greasing the pan to make it easier.)
- Place in the oven and set the timer for 30 minutes.
- While they are cooking, make the glaze. Simply mix the ingredients in a bowl. When the cupcakes have 20 minutes left, add the glaze.
- Make mashed potatoes however you normally would, but slightly creamier than normal so they will pipe better. Then pipe them onto the cupcakes and broil for 2-3 minutes.
Labels:
Bread Crumbs,
Carrots,
Garlic,
Ground Beef,
Ketchup,
Main Dishes,
Meatloaf,
Onion,
Recipes
Tuesday, March 25, 2014
Thai Red Curry
Bear with me. This is going to be a long post. Thai curry is more of a difficult dish. But, man, is it worth it! And once you get the hang of it it doesn't take very long. It all moves very quickly. So, read through all of the directions and, if you have any questions, leave me a note in the comments.
Here is what you'll need (most of it can be found in the Asian aisle at the grocery store): Fish Sauce (I prefer Squid brand), Chicken, Coconut Milk (I prefer Thai Kitchen), Red Curry Paste (I prefer Maesri brand), Palm Sugar, and whichever veggies you want. This time, I used Red Bell Pepper, Carrot, Bamboo Shoots, and Onion. I usually also use Baby Corn, but we were out. Not pictured (because I forgot): Chicken Stock and Thai Basil.
*You'll also need a large Wok. You can use a pan if that's all you have, but a Wok will work best.*
*If you don't have Fish Sauce, you can use Soy Sauce and if you don't have Palm Sugar, you can use sugar.*
*Make sure not to shake the coconut milk. You don't want it to mix in the can.*
First, you'll need to prep the veggies and the meat. You won't have time to cut it later while you're cooking. So chop up the vegetables...
And slice the chicken. I've found that it cooks better (and tastes better) if you cut it into really small, thin slices.
After you do that, set those aside for now. It's time to start making your curry sauce. When you open the coconut milk, there will be a thick layer on top. Scoop out the thick part and put it in the pan (with the pan off). There should be about 3 Tablespoons worth. Set the rest of the can aside for now.
Next, add the Palm Sugar. Add 2-3 teaspoons.
Then, add 1-2 Tablespoons of the Curry Paste.
Last, add about a Tablespoon of your fish sauce.
Start stirring and mix all of the ingredients together.
You'll need to stir constantly.
It will start bubbling and turning oily.
Keep stirring constantly. Once it's a nice bright orange color, stir in the rest of the first jar of coconut milk.
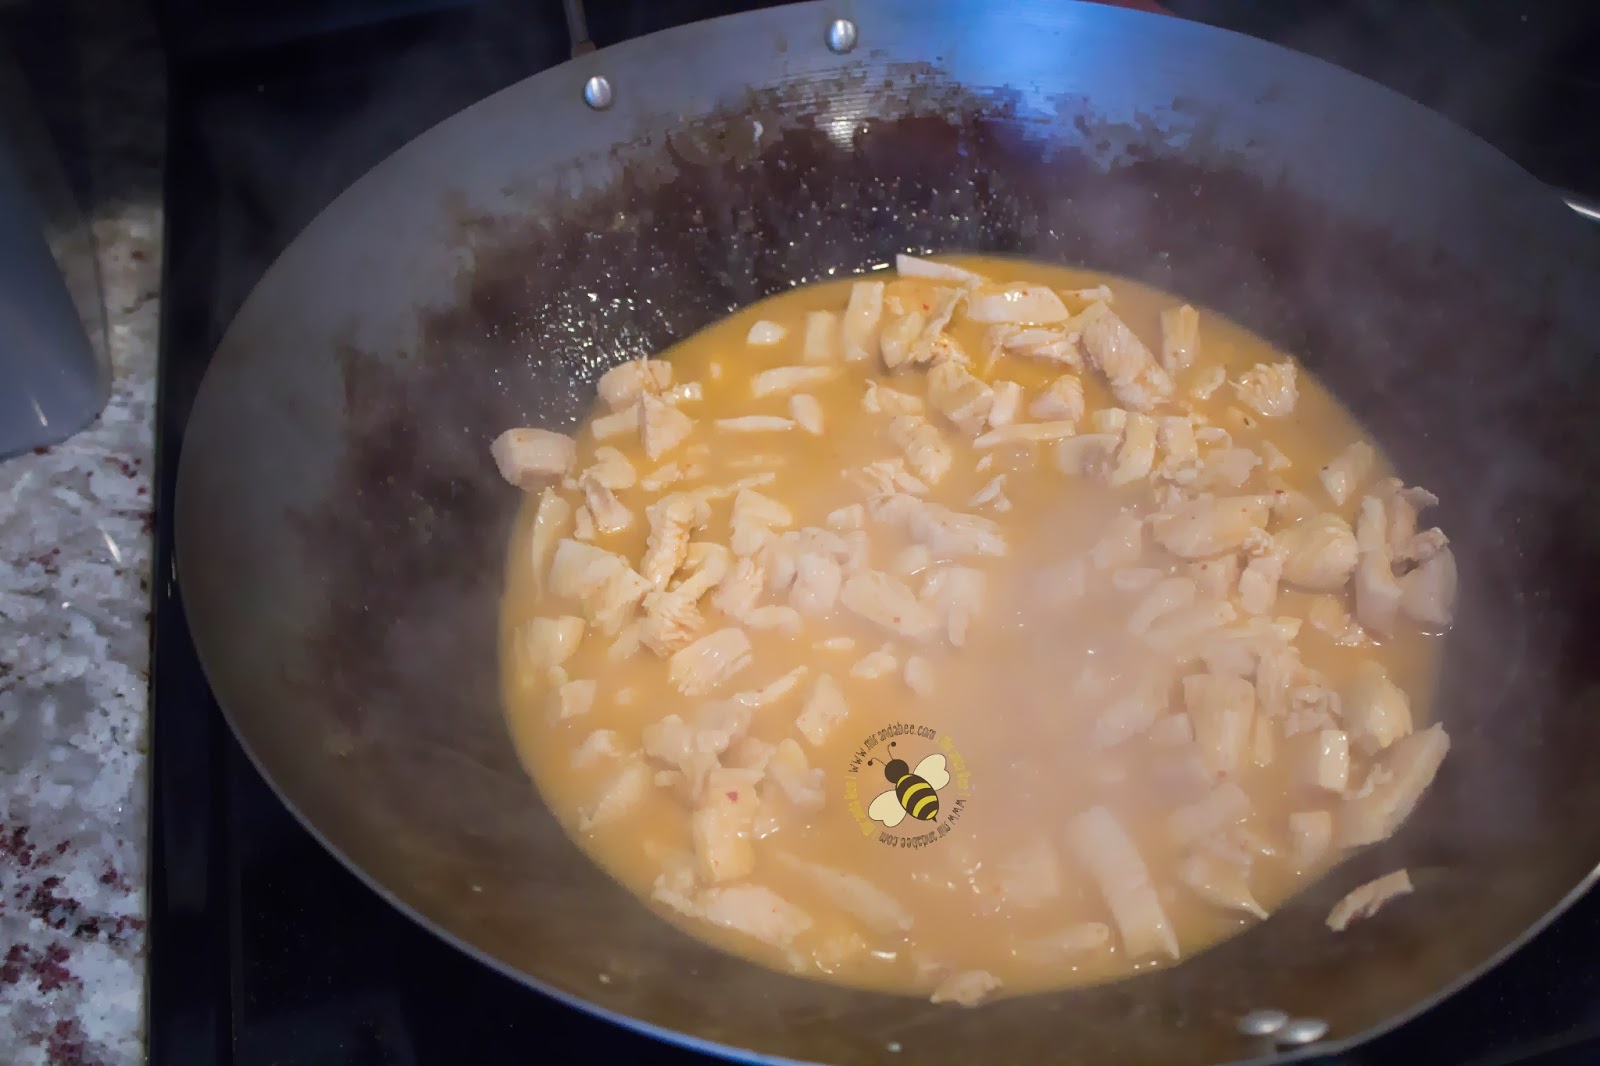
Once it starts to come back to a boil, add the chicken.
Cook until the chicken is cooked mostly through, but not all the way.
Take the chicken out and set it aside. Add the chicken stock and the veggies to the pan.
Cook the vegetables all the way through.
Once the vegetables are cooked all the way, add the chicken back to the pan and stir. Take a little taste and add ingredients to change the flavor based on your preference. Add curry paste for more spice, palm sugar for a sweeter taste, and fish sauce for more salt.
When the curry is done, add the Thai Basil and stir.
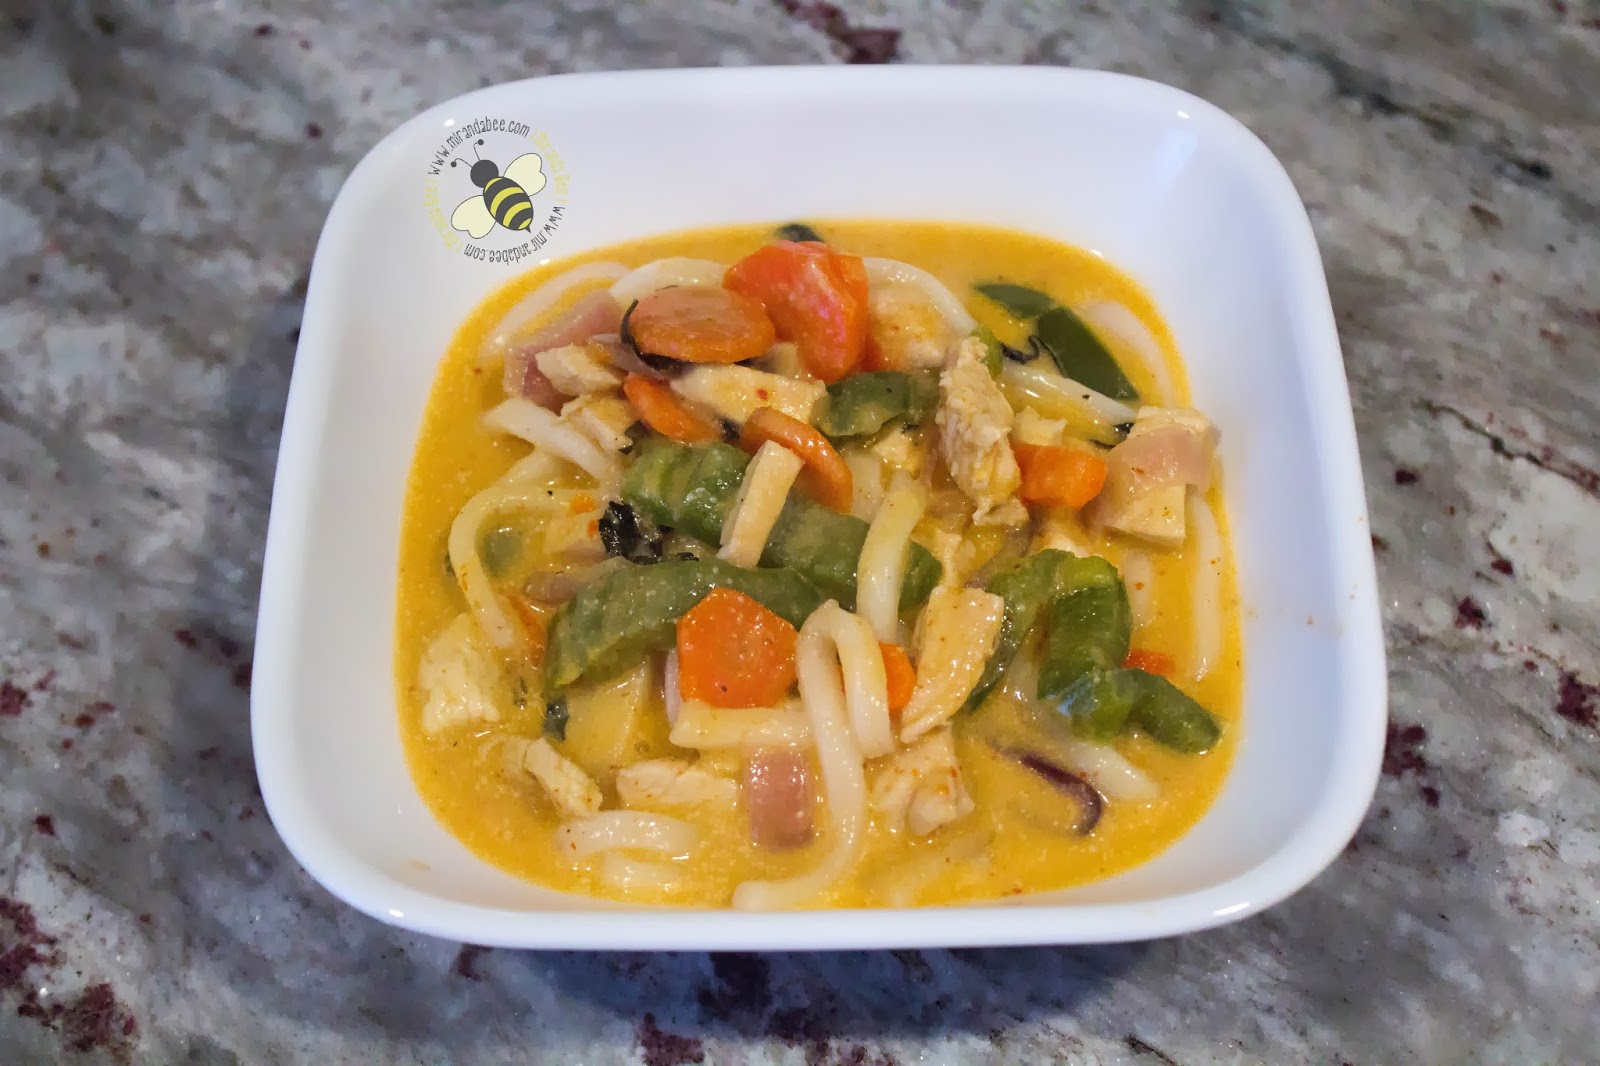
Once it's done, you can serve it over rice, with noodles, or by itself. Our favorite way to eat it is over rice or with rice noodles, but this time we decided to have it with Udon noodles.
As I said, it takes some time to learn. But, once you get the hang of it, you'll be able to make it without much difficulty. You'll also be able to tweak the recipe to suit your tastes.
Here is what you'll need (most of it can be found in the Asian aisle at the grocery store): Fish Sauce (I prefer Squid brand), Chicken, Coconut Milk (I prefer Thai Kitchen), Red Curry Paste (I prefer Maesri brand), Palm Sugar, and whichever veggies you want. This time, I used Red Bell Pepper, Carrot, Bamboo Shoots, and Onion. I usually also use Baby Corn, but we were out. Not pictured (because I forgot): Chicken Stock and Thai Basil.
*You'll also need a large Wok. You can use a pan if that's all you have, but a Wok will work best.*
*If you don't have Fish Sauce, you can use Soy Sauce and if you don't have Palm Sugar, you can use sugar.*
*Make sure not to shake the coconut milk. You don't want it to mix in the can.*
First, you'll need to prep the veggies and the meat. You won't have time to cut it later while you're cooking. So chop up the vegetables...
And slice the chicken. I've found that it cooks better (and tastes better) if you cut it into really small, thin slices.
After you do that, set those aside for now. It's time to start making your curry sauce. When you open the coconut milk, there will be a thick layer on top. Scoop out the thick part and put it in the pan (with the pan off). There should be about 3 Tablespoons worth. Set the rest of the can aside for now.
Next, add the Palm Sugar. Add 2-3 teaspoons.
Then, add 1-2 Tablespoons of the Curry Paste.
Last, add about a Tablespoon of your fish sauce.
Once the 4 ingredients are in the pan, turn it onto medium high heat.
Start stirring and mix all of the ingredients together.
You'll need to stir constantly.
It will start bubbling and turning oily.
Keep stirring constantly. Once it's a nice bright orange color, stir in the rest of the first jar of coconut milk.
Once it starts to come back to a boil, add the chicken.
Cook until the chicken is cooked mostly through, but not all the way.
Take the chicken out and set it aside. Add the chicken stock and the veggies to the pan.
Cook the vegetables all the way through.
Once the vegetables are cooked all the way, add the chicken back to the pan and stir. Take a little taste and add ingredients to change the flavor based on your preference. Add curry paste for more spice, palm sugar for a sweeter taste, and fish sauce for more salt.
When the curry is done, add the Thai Basil and stir.
Once it's done, you can serve it over rice, with noodles, or by itself. Our favorite way to eat it is over rice or with rice noodles, but this time we decided to have it with Udon noodles.
As I said, it takes some time to learn. But, once you get the hang of it, you'll be able to make it without much difficulty. You'll also be able to tweak the recipe to suit your tastes.
print recipe

Ingredients
Details
Prep time: Cook time: Total time: Yield: 8 servings

Thai Red Curry
by Miranda at mirandabee.com March-25-2014
A fragrant, savory dish that can be made anywhere from mild to spicy, depending on your taste.
Ingredients
- 1-2 Tbsp Fish Sauce
- 1-2 pounds Chicken
- 2 cans Coconut Milk
- 2-3 Tbsp Red Curry Paste
- 2-3 tsp Palm Sugar
- 1/2 cup Chicken Stock
- 3-4 Carrots
- 1 Onion
- 1-2 Bell Peppers
- 1 can Baby Corn
- 1 can Bamboo Shoots
- 2 Tbsp Thai Basil
- Serve with Rice or Noodles
Instructions
1. Chop your vegetables and set them aside in a bowl. Thinly slice the chicken and set it aside in it's own bowl.
2. Open the coconut milk and spoon out the thick layer on top and put it in the pan (while the pan is off). Also add the 2-3 teaspoons palm sugar, 1-2 Tablespoons curry paste, and a Tablespoon fish sauce. (Set the remainder of the can of coconut milk aside for later.)
3. Once all 4 ingredients are in the pan, turn it onto medium high heat and stir. Stir continuously until the sauce becomes oily.
4. Keep stirring constantly. Once the sauce is a bright orange color, stir in the rest of the first jar of coconut milk into the pan.
5. Once it reaches a boil again, add the chicken. Cook the chicken until it's cooked mostly through and remove it. Set it aside in a bowl.
6. Add the chicken stock and the veggies to the pan. Cook the vegetables all the way through.
7. Once the vegetables are cooked, add the chicken back to the pan and stir. Take a little taste and add ingredients to change the flavor based on your preference. Add curry paste for more spice, palm sugar for a sweeter taste, and fish sauce for more salt.
8. Add the Thai Basil to the pan and stir.
9. Serve it over rice, with noodles, or plain.
Details
Labels:
Bell Pepper,
Carrots,
Chicken,
Corn,
Curry,
Main Dishes,
Onion,
Recipes,
Rice,
Thai
Subscribe to:
Posts (Atom)


